


In the dynamic world of digital design, Adobe Photoshop continues to reign as one of the most powerful and versatile software tools. With its vast array of features and functionalities, Photoshop empowers designers and photographers to bring their creative visions to life. Among its many innovative tools, Smart Objects stand out as a valuable asset that can enhance efficiency, flexibility, and overall workflow. In this article, we will delve into the concept of Smart Objects, explore their benefits, and provide you with practical insights on how to effectively utilize them in your Photoshop projects.
Understanding Smart Objects
Smart Objects serve as intelligent containers within Photoshop that preserve the original qualities and attributes of an embedded object or layer. Essentially, they act as a protective shield, allowing designers to make non-destructive edits without compromising the integrity of the original content. Whether you’re working with raster graphics, vector illustrations, or complex layer compositions, Smart Objects offer a non-linear and flexible approach to editing that saves time and effort in the long run.
Advantages of Using Smart Objects
- Preserving Image Quality: By converting your layers or objects into Smart Objects, you ensure that the original image quality remains intact, regardless of the modifications you make. This is particularly beneficial when scaling, rotating, or applying filters, as Smart Objects retain their sharpness and clarity.
- Non-Destructive Editing: One of the major advantages of Smart Objects is their non-destructive nature. Any changes made to a Smart Object can be easily modified or reversed at any point in your design process. This flexibility allows for experimentation and encourages creative exploration without the fear of irreversible damage.
- Efficient Workflow: Smart Objects enable seamless integration with other Adobe applications such as Adobe Illustrator or Adobe InDesign. This interoperability streamlines your workflow, allowing you to work on various design elements across different platforms while maintaining consistency and efficiency.
- Linked Instances: Another powerful feature of Smart Objects is the ability to create linked instances. By establishing a link between multiple Smart Objects, you can ensure that any changes made to one instance automatically reflect across all linked instances. This feature is particularly useful when working on design templates or recurring elements within a project.
Utilizing Smart Objects in Photoshop
Now that we’ve explored the benefits of Smart Objects, let’s delve into the practical steps of utilizing them effectively in your Photoshop projects.
1.Converting Layers to Smart Objects
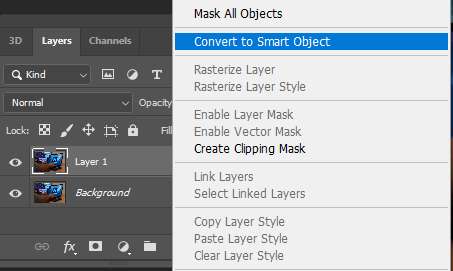
To convert a layer into a Smart Object, simply right-click on the desired layer in the Layers panel and select “Convert to Smart Object.” Alternatively, you can also go to the “Layer” menu at the top, navigate to “Smart Objects,” and choose “Convert to Smart Object.” Once converted, the layer will be encapsulated within a Smart Object container, ready for non-destructive editing.
2. Editing Smart Objects
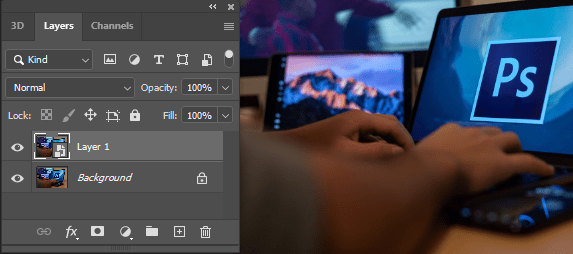
To edit the content of a Smart Object, double-click on its thumbnail in the Layers panel. This action opens the Smart Object in a separate window, allowing you to make modifications without affecting the original content or other instances of the Smart Object.
Once you’re done editing, simply save and close the Smart Object window to see the changes reflected in your main Photoshop document.
3. Applying Filters and Adjustments
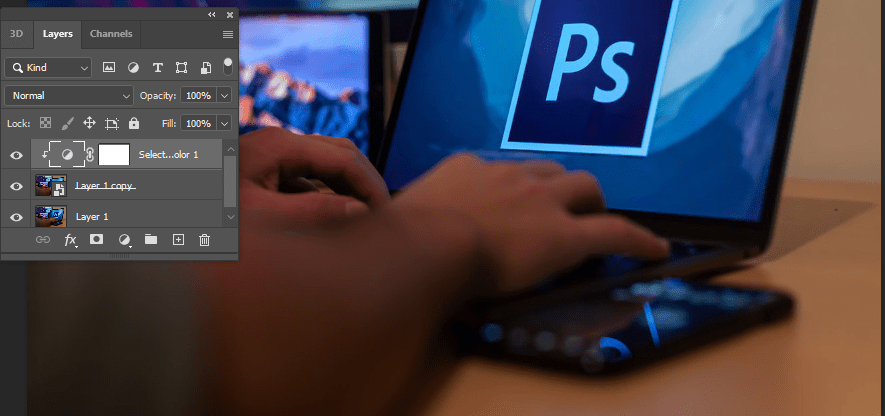
One of the advantages of Smart Objects is the ability to apply filters and adjustments non-destructively via a clipping mask.
To add a filter or adjustment to a Smart Object, right-click on any desired effect e.g. selective color from the adjustment layer panel and hold the alt key between the adjustment layer and the smart object layer to display the tag arrow and then right click to tag your adjustment layer to the smart layer.
This way all edits will be tagged to your smart layer without you working in another windows.
4. Creating Linked Smart Objects
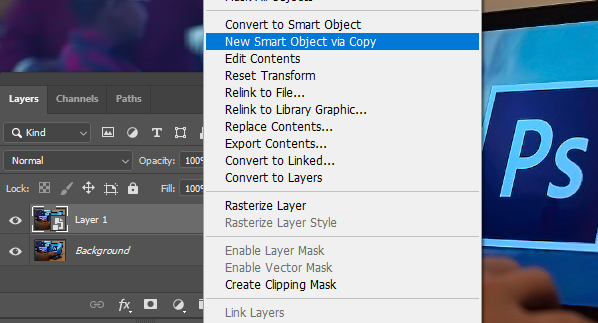
To create linked Smart Objects, start by converting a layer into a Smart Object using the methods mentioned earlier. Next, duplicate the Smart Object by right-clicking on it and selecting “New Smart Object via Copy.” You can also use the shortcut Ctrl+J (Command+J on Mac) to duplicate the Smart Object.
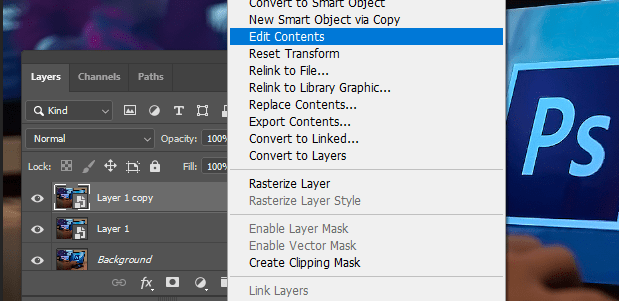
Once you have the duplicated Smart Object, right-click on it and choose “Edit Contents.” This will open a new window where you can make changes to the Smart Object’s content. Any modifications you make in this window will be reflected in all linked instances of the Smart Object.
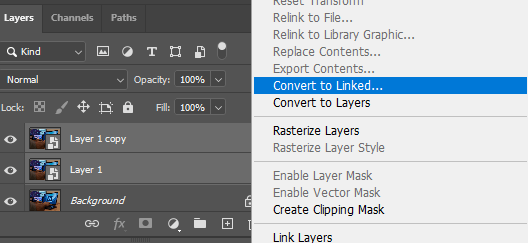
To link multiple Smart Objects, select the layers that contain the Smart Objects you want to link by holding down the Ctrl key (Command key on Mac) and clicking on the respective layer thumbnails in the Layers panel. Right-click on any of the selected layers and choose “Convert to Linked.”
Now, any changes you make to one linked Smart Object will automatically update all other linked instances, saving you time and effort when working on repetitive design elements.
Using Smart Objects for Mockups and Templates

Smart Objects are particularly beneficial when working with mockups and templates. They allow you to easily replace the placeholder content with your own designs while maintaining the perspective, proportions, and effects of the original template.
To use a Smart Object in a mockup or template, locate the Smart Object layer within the Layers panel. Double-click on the Smart Object’s thumbnail to open it in a separate window.
In this window, replace the placeholder content with your desired design. Some mockups like the one above ill have the palceholder named ” Place your design here” simply click and replace the element you find there with yours. In our case we added the color green.

After making the changes, save and close the Smart Object window. The mockup or template will now display your design in the original context, giving you a realistic preview of the final result.
Enhance your design workflow with flexibility and efficiency.
Smart objects are a non destructive feature of Photoshop. By utilizing Smart Objects, you can preserve image quality, work non-destructively, maintain an efficient workflow, and create linked instances for easy updates. Whether you’re a professional designer or an aspiring enthusiast, integrating Smart Objects into your Photoshop projects can elevate the quality and impact of your work.
Experiment with Smart Objects, explore their capabilities, and discover how they can revolutionize your design process. Embrace the non-linear editing approach, and unleash your creativity without fear of irreversible changes. With Smart Objects, you have the power to refine and perfect your designs while maintaining the integrity of your original content.
So, harness the potential of Smart Objects, and unlock new possibilities in your Photoshop endeavors!

